Optimizing the user experience
Posted on April 3, 2023 (Last modified on July 21, 2023) • 10 min read • 1,927 wordsGuide on how to optimize the user experience of your site.

Introduction
Hinode includes support for Bootstrap and Font Awesome by default. Although these packages provide many great features, they do increase the size of your site’s assets. This guide illustrates several strategies on how to optimize your Hinode site. We will use the Hinode documentation repository as a case example.
A site generated by Hinode consists of many static files, such as fonts, HTML, stylesheets, images, and JavaScript files. The Core Web Vitals are three performance metrics introduced by Google. These metrics are an indication of the real-life user experience of your site. Pagespeed Insights uses these metrics to evaluate the performance of your site.


- Largest Contentful Paint (LCP): measures loading performance. To provide a good user experience, LCP should occur within 2.5 seconds of when the page first starts loading.
- First Input Delay (FID): measures interactivity. To provide a good user experience, pages should have a FID of 100 milliseconds or less.
- Cumulative Layout Shift (CLS): measures visual stability. To provide a good user experience, pages should maintain a CLS of 0.1 or less.
Not all files are critical to your user experience. In general, the following static files are considered vital to the rendering of a web page:
- CSS files
- JavaScript files added in the
<head>section - Fonts added from either CDN or a local server
Images, media files, and <script> tags placed at the bottom of the <body> section are treated as non-render blocking resources.
Step 1 - Setting up the test case
We will now use the Hinode documentation site as a real-life case example. We will use Google Chrome to establish the baseline performance and identify opportunites for improvement. If not done so already, download and install Chrome from the official site. Use the following commands to download the latest Hinode docs repository. Be sure to comply with Hinode’s prerequisites first - this guide requires npm.
git clone https://github.com/gethinode/docs.git && cd docsFor now, set the purge setting to false in config/_default/params.toml:
[style]
  purge = false
Install the dependencies and start a local web server with the following commands:
npm install
npm run start
Web Server is available at http://localhost:1313/ (bind address 0.0.0.0)
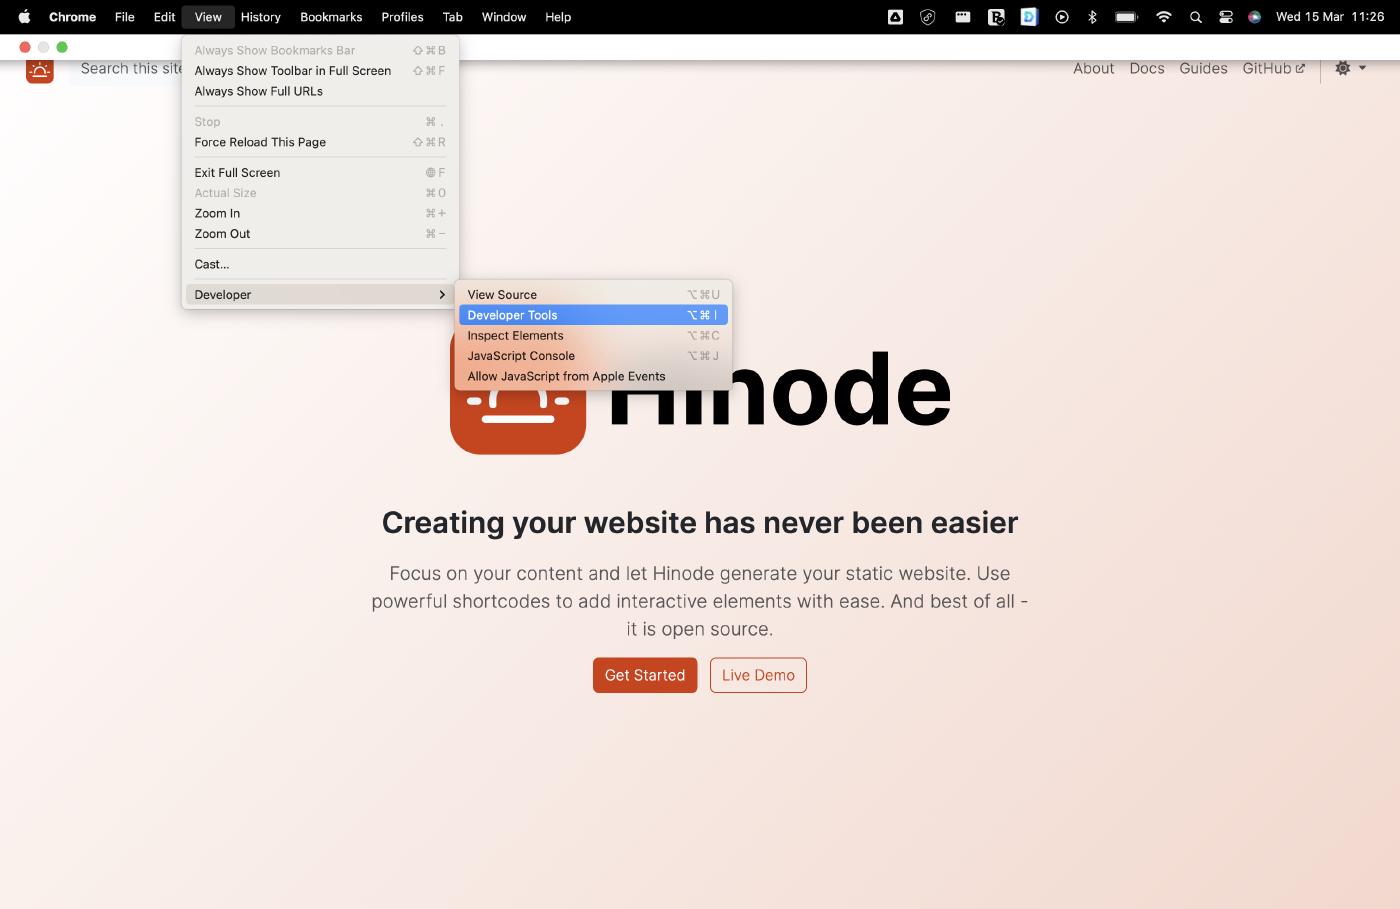
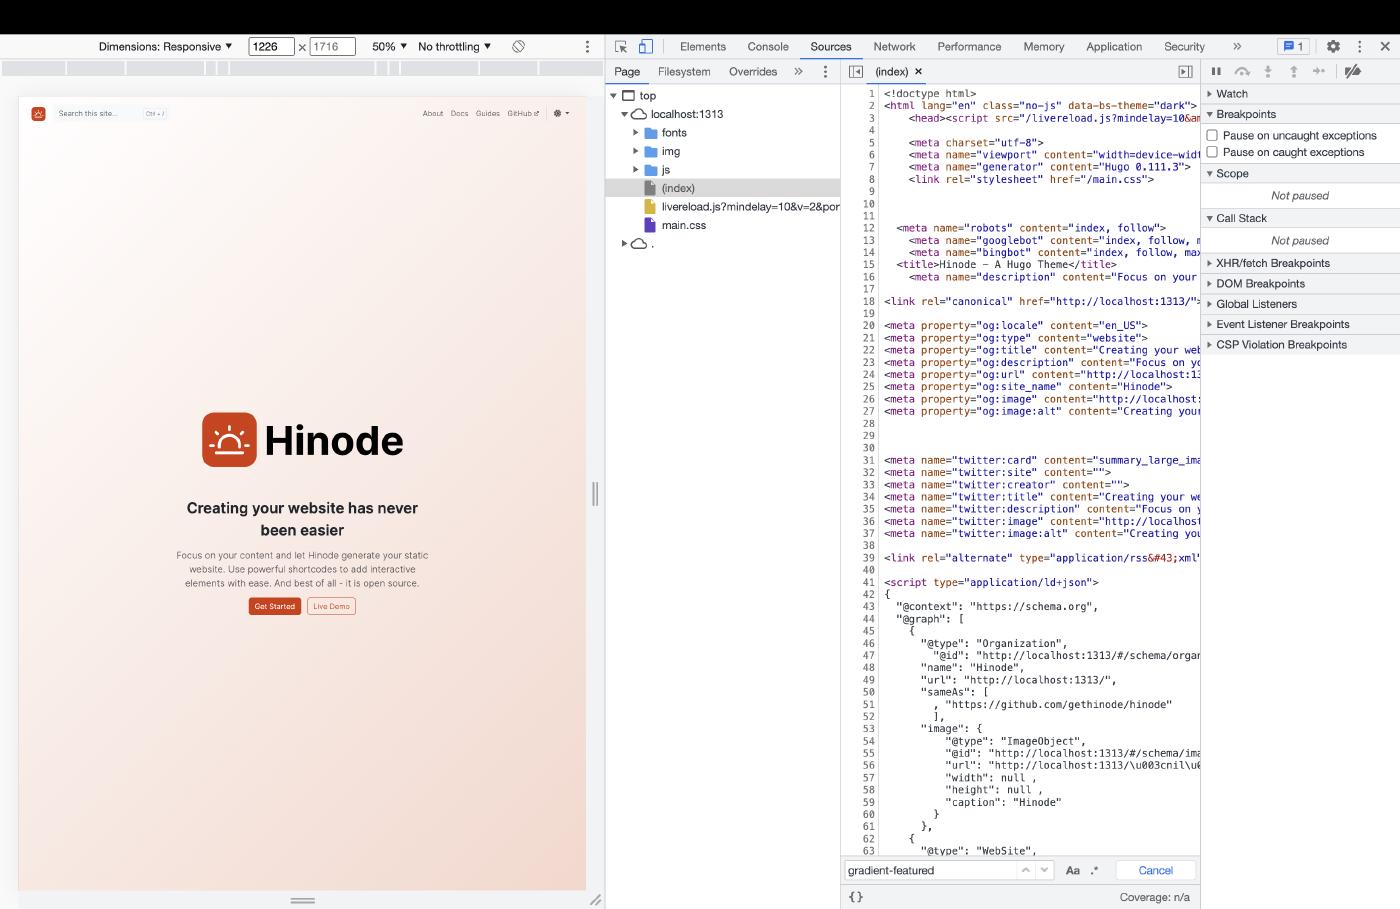
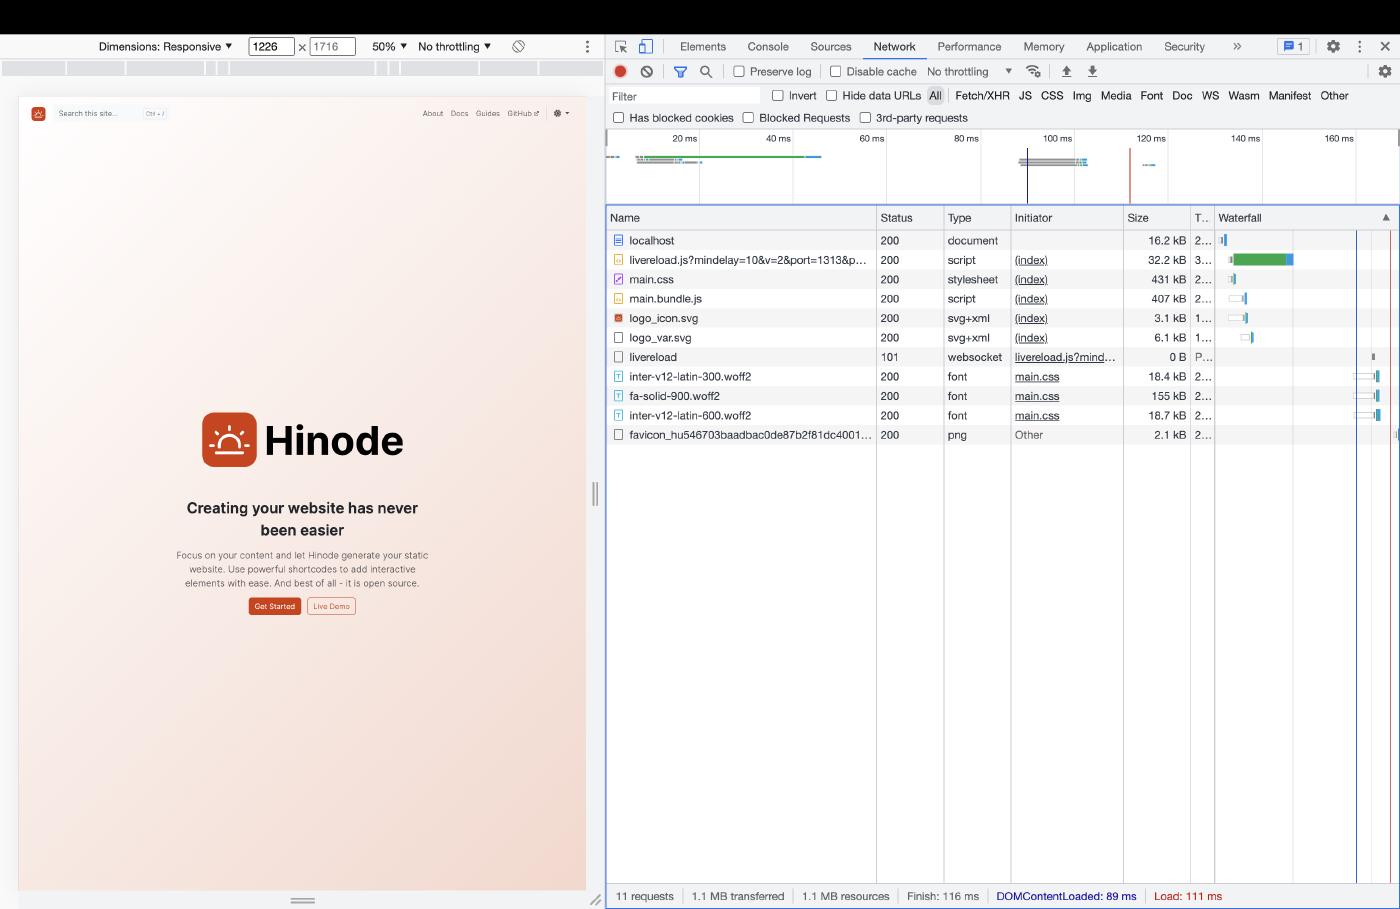
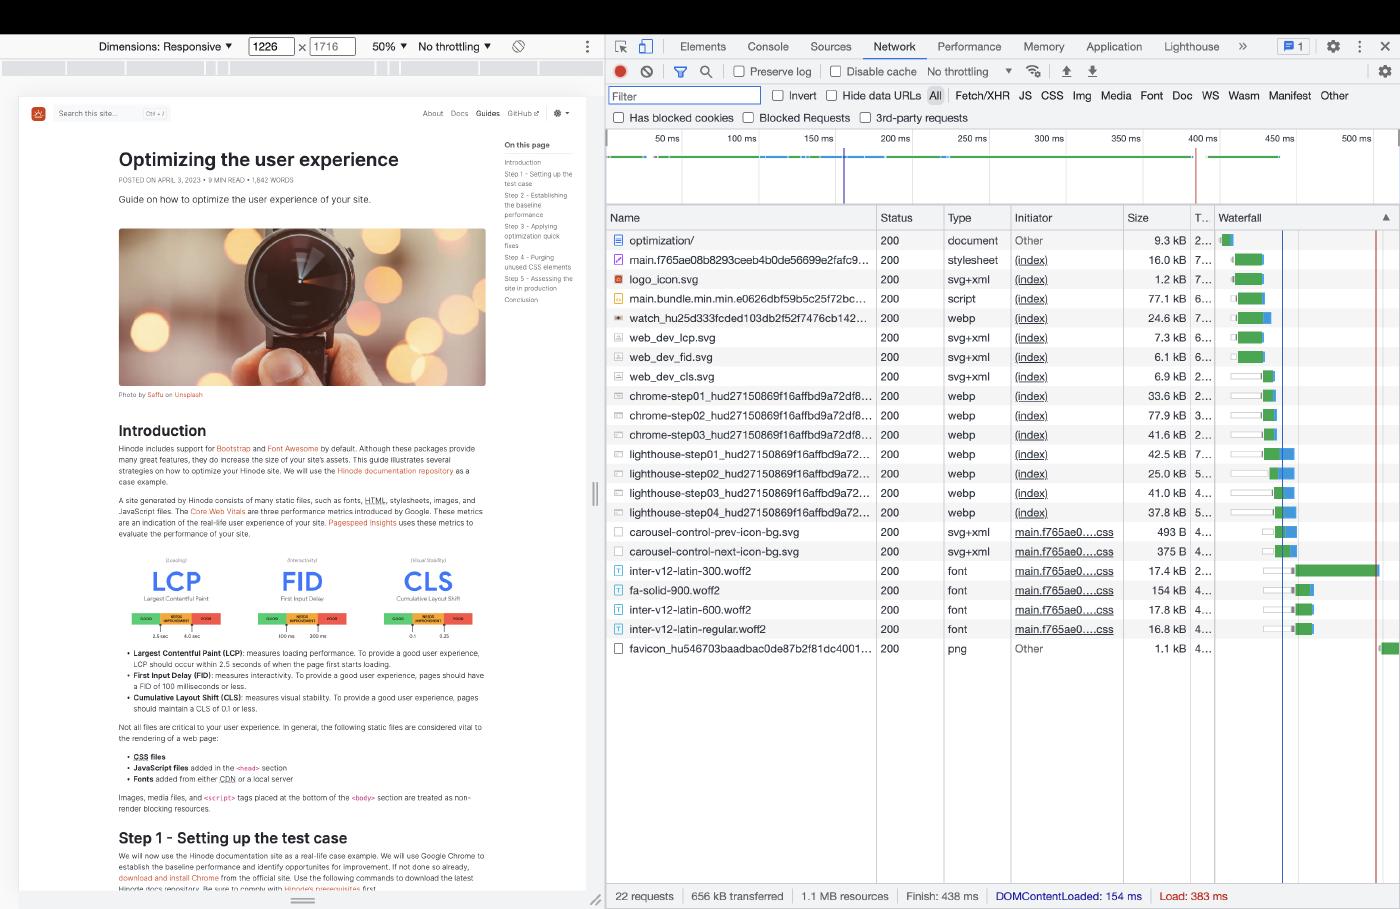
Press Ctrl+C to stopStart Google Chrome and navigate to the address of the local webserver (usually http://localhost:1313/). Next, open the Developer Tools by navigating to View/Developer/Developer Tools. The right-hand side of your screen now displays several tools, such as Sources and Network. Click on the Sources tool to review the static files downloaded by Chrome. You can use this tool to inspect the output generated by Hugo. It includes a file called (index), which is your main HTML page. Another element is main.css, which maintains the stylesheet. Navigate to the Network tool to review the size of the various assets and to study the rendering path of your homepage. Both the main.css file and main.bundle.js file are about 400KB in size.
Step 2 - Establishing the baseline performance
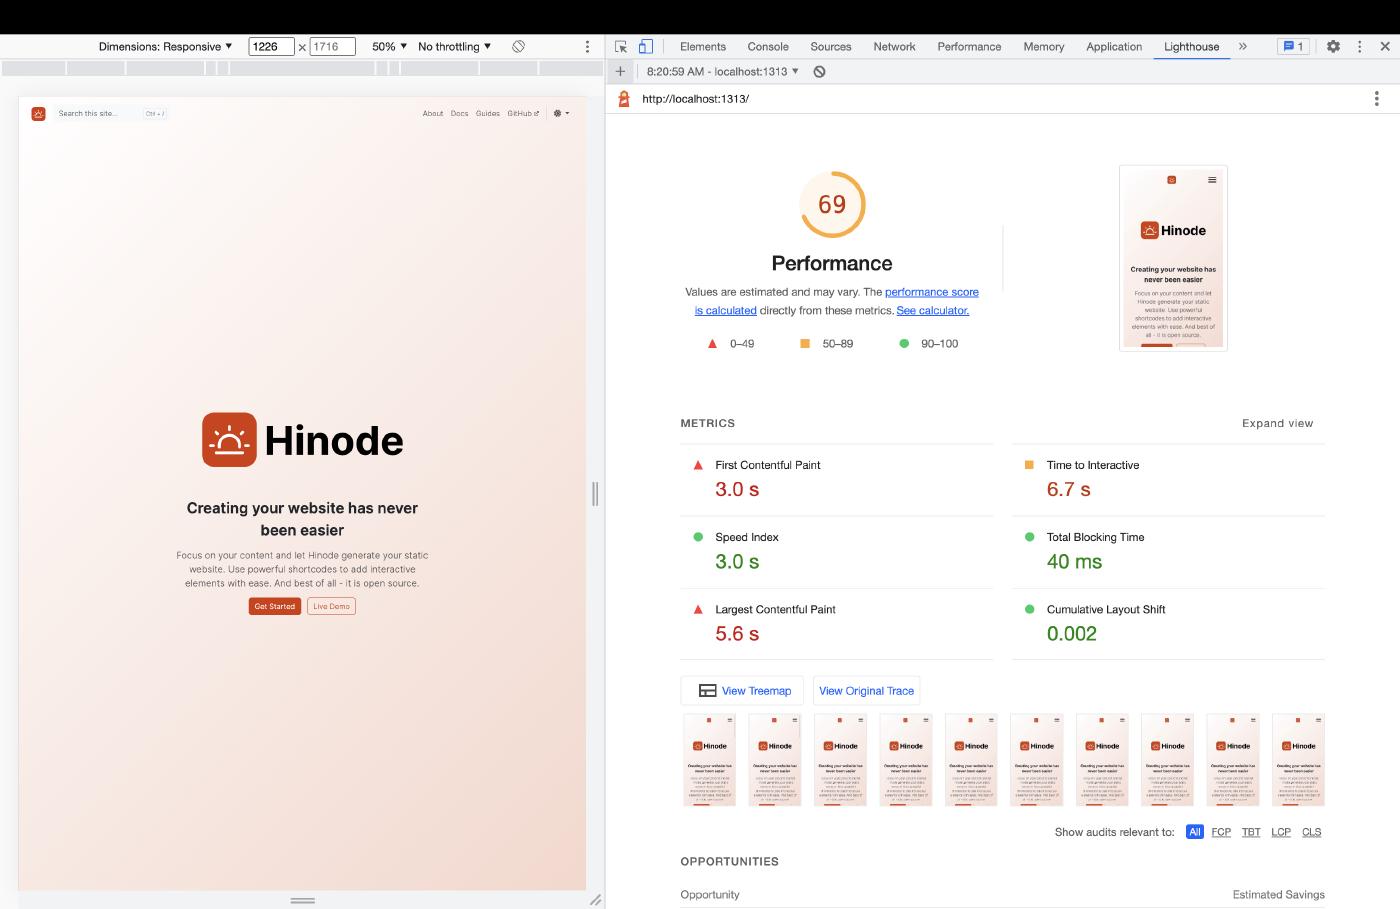
Go to the Lighthouse tool to start a performance assessment of your site. The tool might be hidden at first, click on the >> icon to expand the menu. Generate a Lighthouse report for a Mobile device and put a tickmark for Performance. Click on the button Analyze page load to start the evaluation. The Google Lighthouse test evaluates the performance of your site from a user perspective. The Mobile test simulates the rendering your site over a wireless network, and is more demanding than the Desktop test. The performance score will probably be between 60 and 80. The score is derived from several metrics, including the Largest Contentful Paint.
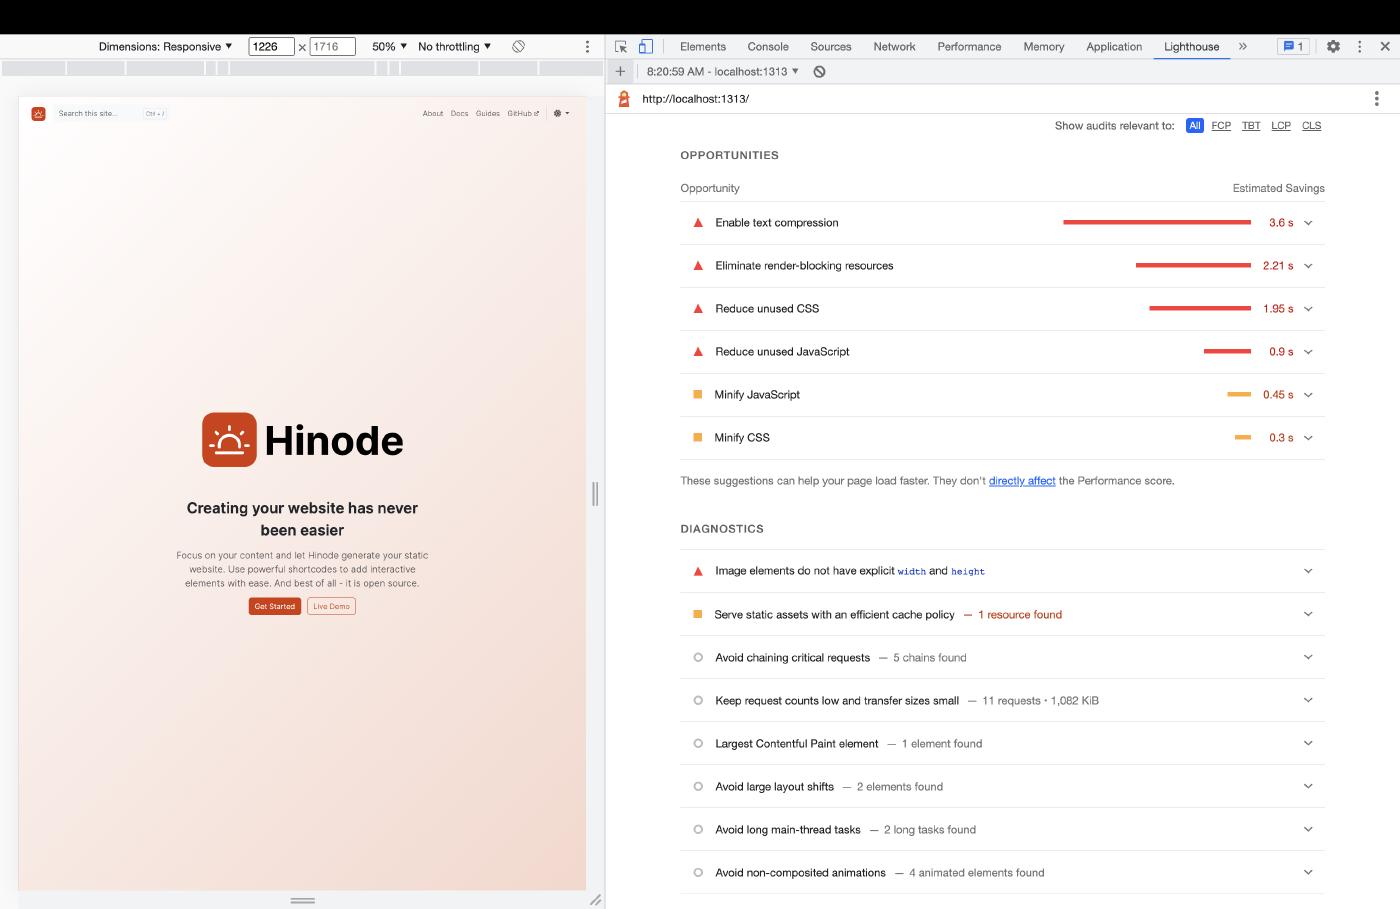
Scroll below in the Lighthouse evaluation report to study several opportunities and their estimated savings. The opportunities will likely include the following topics:
Enable text compression
The current web server serves several assets in plain text. Compressing text-based resources will reduce the download size of those resources.
Eliminate render-blocking resources
Hinode includes the
main.bundle.jsfile in the page body instead of the header by default, thus keeping this file from the critical rendering path. However, themain.cssfile is render-blocking by default - no matter where included. Reducing the size of this file will improve the page loading performance. One notable exception is the script to control the site’s color mode, which is considered to be a critical resource.Reduce unused CSS and JavaScript
Both the CSS file and JavaScript file include unused styles and elements. This is largely the result of using general libraries such as Bootstrap and Font Awesome. Removing unnecessary elements will reduce the size of both files.
Minify CSS and JavaScript
Lastly, the CSS file and JavaScript file contain formatting to make them more readable. Although formatting your code is a good software development practice and improves maintainability, it is unnecessary for the code in production. Minifying is an approach to remove all formatting - such as new line characters, tabs, and spaces - from the code.
Step 3 - Applying optimization quick fixes
The Hinode documentation site uses several optimization strategies to reduce the size of the generated assets.
Add responsive images optimized for multiple screen sizes and devices
Hinode supports responsive images out-of-the-box. Hinode uses Hugo to preprocess images on the server. By taking advantage of so-called image sets, the client’s browser can decide which image to download whilst reducing the download size. Review the image documentation for more details.
Serve font files locally
Font providers such as Google Fonts add font-face definitions for all the character sets a typeface comes with. By serving fonts locally you can define the exact definitions required. See the fonts documentation for more details.
Minify CSS and JavaScript files in production
Hinode starts a local web server in development mode to simplify debugging by default. In production mode, Hinode minifies the CSS and JavaScript files and does not generate any debugging information (such as source maps).
The first two strategies are already taken care off. We will now switch to production mode to evaluate the impact of minification. Stop the current web server with CTRL+C. Run the command npm run start:prod to start the local web server in production mode.
npm run start:prod
Environment: "production"
Web Server is available at http://localhost:1313/ (bind address 0.0.0.0)
Press Ctrl+C to stop
Rerun the Lighthouse test once your site is up and running. The performance score will likely be in the mid eighties and the minification remark will have disappeared.
Step 4 - Purging unused CSS elements
Although we have increased the site’s performance, we still have several remaining areas of improvement. From a build perspective, you can either limit what you put into the build pipeline, or remove unused items from the build output. The Bootstrap documentation explains how to use lean file imports, catering for the first strategy. Being a documentation site, the current test case uses all Bootstrap elements. This guide therefore focuses on purging the stylesheets as last step in the build pipeline.
Hinode uses SCSS files as part of its pipeline to generate the stylesheets for your site. Under the hood, Hinode utilizes Hugo’s pipe functionality to process its SCSS files. We will now set the purge setting to true in config/_default/params.toml:
[style]
  purge = true
Next, we will need to ensure the writeStats setting is set to true also:
[build]
writeStats = trueThis Hugo setting generates a file hugo_stats.json in the repository root. The file is generated once all content files and static files have been processed by Hugo. It provides a list of HTML elements such as tags, classes, and IDs used by your site.
When purging is enabled, Hinode calls the script postcss.config.js in the config folder. This script uses several npm packages, including purgecss-whitelister and @fullhuman/postcss-purgecss. These packages are already added to your repository’s package.json file as development dependencies. The below code snippet sets up the purgecss package and links it to the generated hugo_stats.json file. This instructs purgecss to remove all CSS elements, unless they are referenced in the statistics (meaning they are being used on your site).
const purgecss = require('@fullhuman/postcss-purgecss')({
  content: ['./hugo_stats.json'],
  defaultExtractor: (content) => {
    const els = JSON.parse(content).htmlElements
    return [...(els.tags || []), ...(els.classes || []), ...(els.ids || [])]
  },
  dynamicAttributes: [],
  safelist: []
})
If you rerun the Lighthouse test, the size of the main.css file will appear to be significantly smaller. Unfortunately, your site will also not look right. The purgecss approach is quite aggressive and has removed too many elements from your stylesheet. We will need to visually inspect the site’s pages and put additional elements to the safelist. Additionally, the dark theme also no longer works. We can fix that by passing data-bs-theme to the argument dynamicAttributes. Visually inspecting the page rendering and putting elements to the safelist is a manual exercise. Hinode therefore disables the purge setting by default. Nevertheless, the result can be quite rewarding. Click on the panel below to reveil the full script.
const autoprefixer = require('autoprefixer')({})
const cssnano = require('cssnano')({
  preset: 'advanced'
})
const whitelister = require('purgecss-whitelister')
const purgecss = require('@fullhuman/postcss-purgecss')({
  content: ['./hugo_stats.json'],
  defaultExtractor: (content) => {
    const els = JSON.parse(content).htmlElements
    return [...(els.tags || []), ...(els.classes || []), ...(els.ids || [])]
  },
  dynamicAttributes: ['data-bs-theme'],
  safelist: [
    ...whitelister([
      './assets/scss/theme/theme.scss',
      './_vendor/github.com/gethinode/hinode/assets/scss/common/_styles.scss',
      './_vendor/github.com/gethinode/hinode/assets/scss/components/_clipboard.scss',
      './_vendor/github.com/gethinode/hinode/assets/scss/components/_command.scss',
      './_vendor/github.com/gethinode/hinode/assets/scss/components/_navbar.scss',
      './_vendor/github.com/gethinode/hinode/assets/scss/components/_search.scss',
      './_vendor/github.com/gethinode/hinode/assets/scss/components/_sidebar.scss',
      './_vendor/github.com/gethinode/hinode/assets/scss/components/_syntax.scss',
      './_vendor/github.com/gethinode/hinode/assets/scss/components/_syntax-dark.scss',
      './_vendor/github.com/gethinode/hinode/assets/scss/components/_syntax-light.scss',
      './_vendor/github.com/gethinode/hinode/assets/scss/theme/fonts.scss',
      './_vendor/github.com/gethinode/mod-flexsearch/assets/scss/modules/flexsearch/flexsearch.scss',
      './_vendor/github.com/gethinode/mod-katex/dist/katex.scss',
      './_vendor/github.com/gethinode/mod-leaflet/dist/leaflet.scss',
      './_vendor/github.com/twbs/bootstrap/scss/_carousel.scss',
      './_vendor/github.com/twbs/bootstrap/scss/_dropdown.scss',
      './_vendor/github.com/twbs/bootstrap/scss/_reboot.scss',
      './_vendor/github.com/twbs/bootstrap/scss/_tooltip.scss',
      './_vendor/github.com/twbs/bootstrap/scss/_transitions.scss',
      './_vendor/github.com/twbs/bootstrap/scss/_utilities.scss'
    ])
  ]
})

module.exports = {
  plugins: [
    autoprefixer,
    cssnano,
    purgecss
  ]
}Step 5 - Assessing the site in production
As you might recall, the Lighthouse assessment also recommends to enable text compression to reduce the download size of text-based resources. Hugo’s web server is meant for local development and is not capable of compressing these assets. We will need to publish our site to a server capable of text compression to evaluate the impact of this setting.
hugo_stats.json is checked in to your repository (e.g. not listed in .gitignore). Netlify will not process the artifact during its build process otherwise.The actual deployment of our site is beyond the scope of this guide. Instead, we will review the live Hinode documentation site. You can review the documentation on how to host your site on Netlify, which is the web server behind the Hinode documentation site.
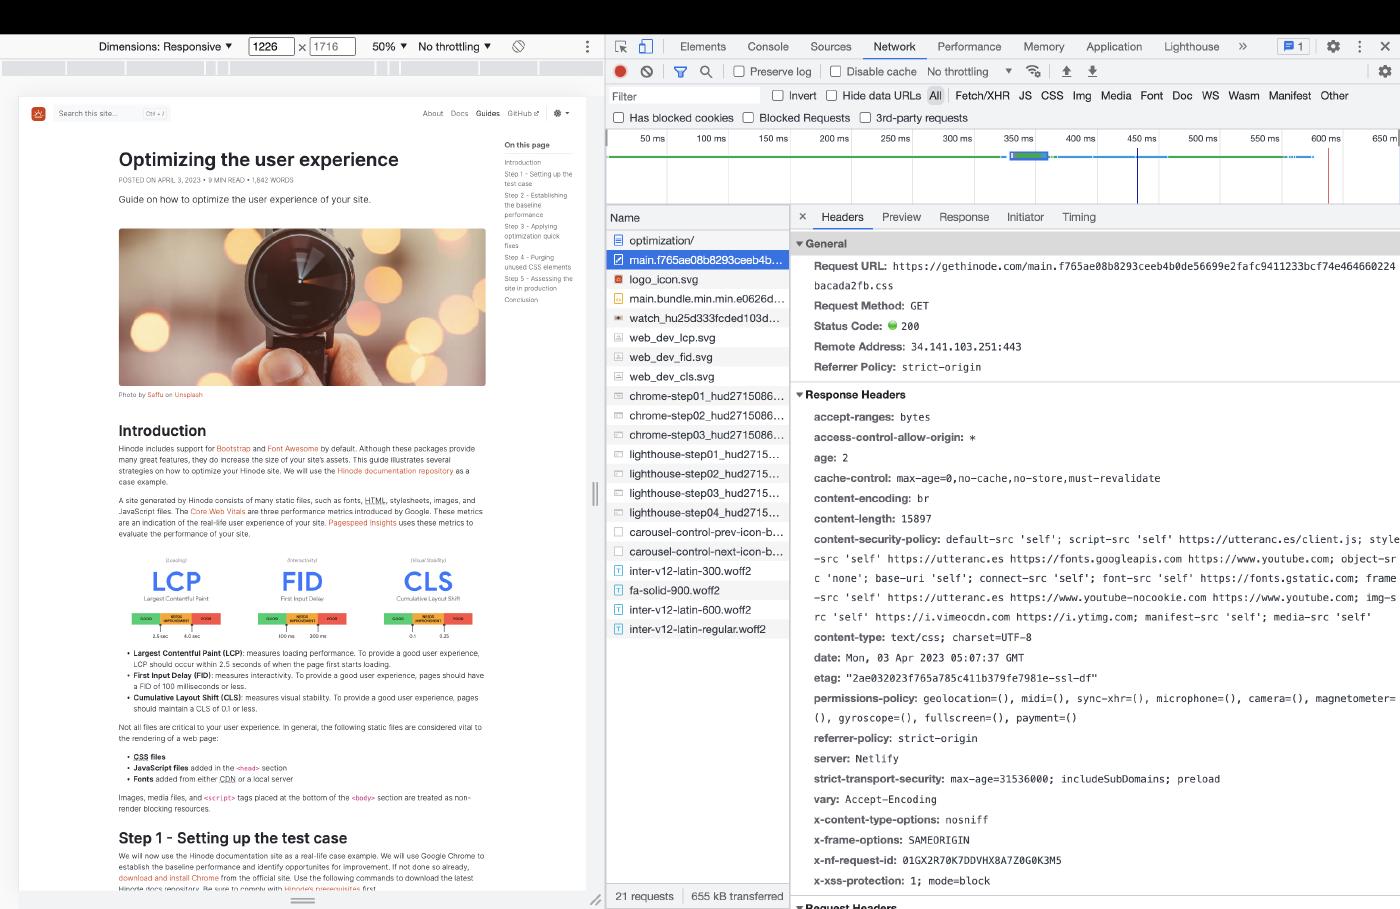
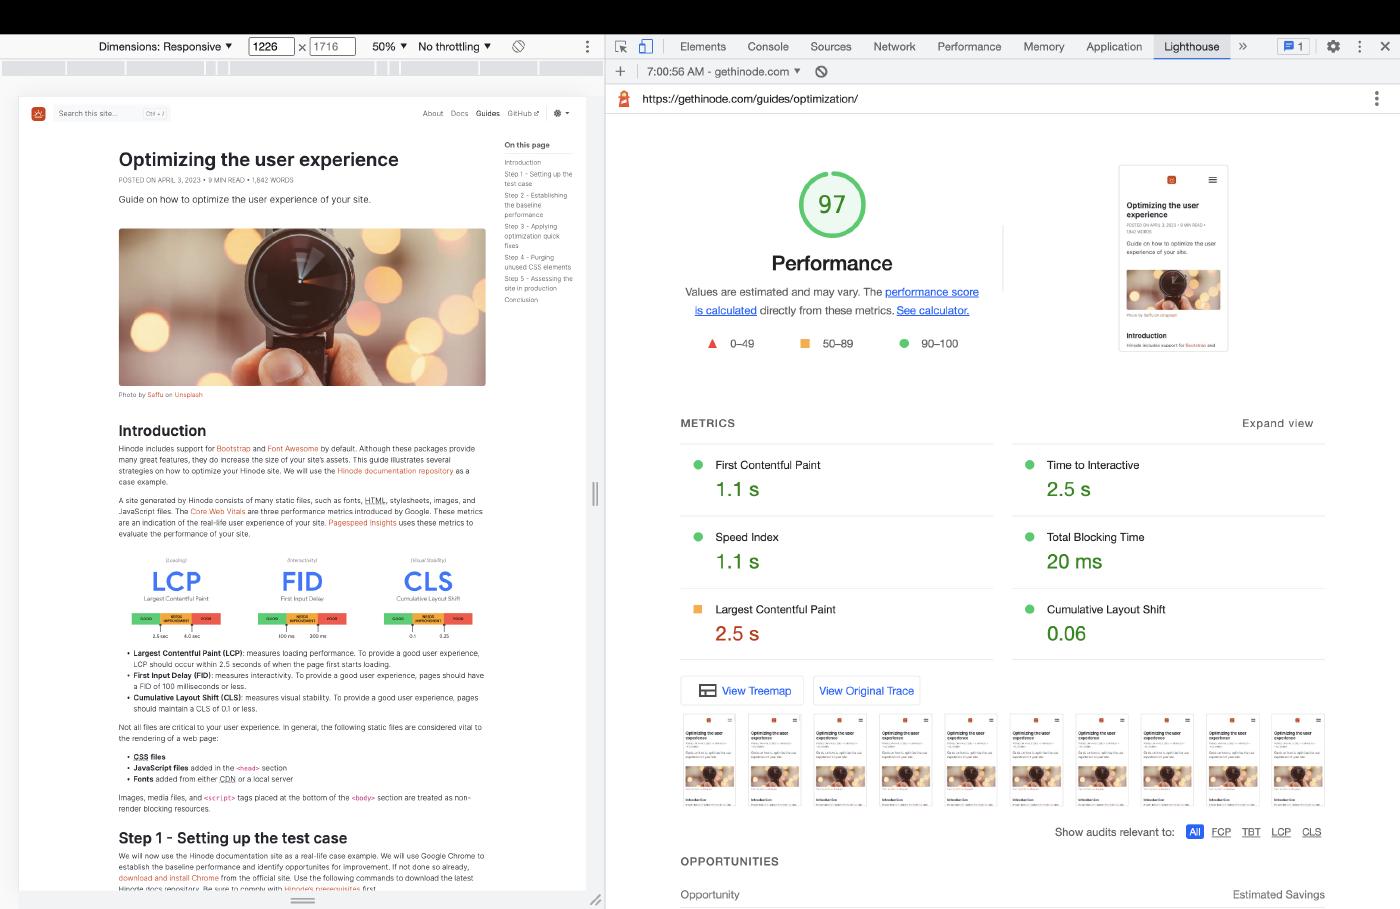
Visit the site https://gethinode.com in Chrome and open up the Development tools. Click on the Network tool and click on the main.css file. The response header will show br for the value content-encoding. This shows the file is served with Brotli encoding, which is one of the compression methods available, next to Gzip and Deflate. Siteground has an insightful blog article explaining the different compression methods. Run a Lighthouse test on the live site to assess the mobile performance score. It will probably be in the range 90 - 100.
Conclusion
Your site is now significantly more lean and responsive. In this guide we have improved the mobile performance score from average to good. The blog article from LogRocket provides more tips and tricks on how to further optimize your site.
