Creating versioned documentation
Posted on July 6, 2023 • 11 min read • 2,318 wordsGuide on how to create versioned documentation using folders and branch deployments.

Introduction
Providing up-to-date and accurate documentation is an important aspect of many software products. Hinode supports sidebar navigation to help your users find the relevant content. However, as your software evolves, you might need to support different versions too. This guides illustrates how you can use Hinode to maintain versioned documentation.
The next paragraphs explain two main strategies. The first strategy is to maintain seperate content folders in your repository. The second strategy uses so-called multi-branch deployments to publish a specific repository branch. You will need a Netlify account to be able to test the multi-branch deployment.
Step 1 - Preparing the basic content
In the first step, we will create a basic documentation site using the Hinode template. The site will be in English only, with a main section called Docs.
Creating a new site
We will now create a new site using the Hinode template. Follow the first step of the guide on how to set up a new site using the Hinode template. Give the repository a recognizable name, such as version-demo.
Discarding localization
For the purpose of this guide we will support the English language only. Be sure to create a new branch first, so you can test any changes before publishing them. The remainder of this guide uses the develop branch for development and the main branch for production.
Follow the steps decribed in the language configuration to discard the localized content for the Dutch language. Start a local server to test the site is working as expected. Navigate in your browser to the local address (http://localhost:1313/ by default) to visually inspect the site.
npm run start

Environment: "development"
Serving pages from memory
Web Server is available at http://localhost:1313/ (bind address 0.0.0.0)
Press Ctrl+C to stop
Adding documentation
Create a new folder docs within content/en to create a new section. We will create three subfolders within the docs section, one for each documentation version:
content/en/docs/0.1content/en/docs/0.2content/en/docs/latest
We will now create a simple about page for each version. Create a file about.md within each version folder. Add the following frontmatter to each file, replacing {version} with 0.1, 0.2, and latest.
---
title: About (v{version})
description: About my product
date: "2023-06-21"
layout: docs
aliases:
  - "/docs/{version}/"
  - "/docs/" # only add this alias in `content/en/docs/latest/about.md``
---
The aliases instruct Hinode to redirect each docs/{version} entry to the correct page. The docs path redirects to the latest about page.
Supporting redirection
Hugo recognizes the /docs/ page as a list page by default. To properly map this entry to the latest about page (defined as an alias previously), we will need to explicitly instruct Hugo not to generate a list page. Create a new file _index.md within content/en/docs with the following content to do so:
---
title: Docs
redirect: "/docs/"
_build:
  list: false
  render: false
---
Step 2 - Configuring versioned navigation
As a next step, we will enable navigation for the Docs section. We will add an entry in the main navigation bar and enable versioned sidebar navigation. Finally, we will add a dropdown menu to the main navigation to enable switching of versions.
Enabling navigation
First we will add a main menu entry for the (latest) docs content. Add the following content to config/_default/menus/menus.en.toml:
[[main]]
  name = "Docs"
  url = "/docs/"
  weight = 40
Update the weight of the tags to 50:
[[main]]
  name = "Tags"
  url = "/tags/"
  weight = 50
Now create a file docs.yml in the data folder with the following content to enable sidebar navigation:
- title: Aboutdocs.yml file to docs-0.1.yml and docs-0.2.yml to create versioned sidebar navigation. Hinode uses data/docs.yml as default sidebar navigation data when no versioned file is available.Finally, we will tell Hinode where to find the versioned docs pages. Hinode uses the permalink of the current page to extract the version label, if any. This label is used to generate the correct links for the main navigation and sidebar navigation. Add the following value to config/_default/params.toml:
[docs]
  contentPath = "/docs/"
Configuring the version switcher
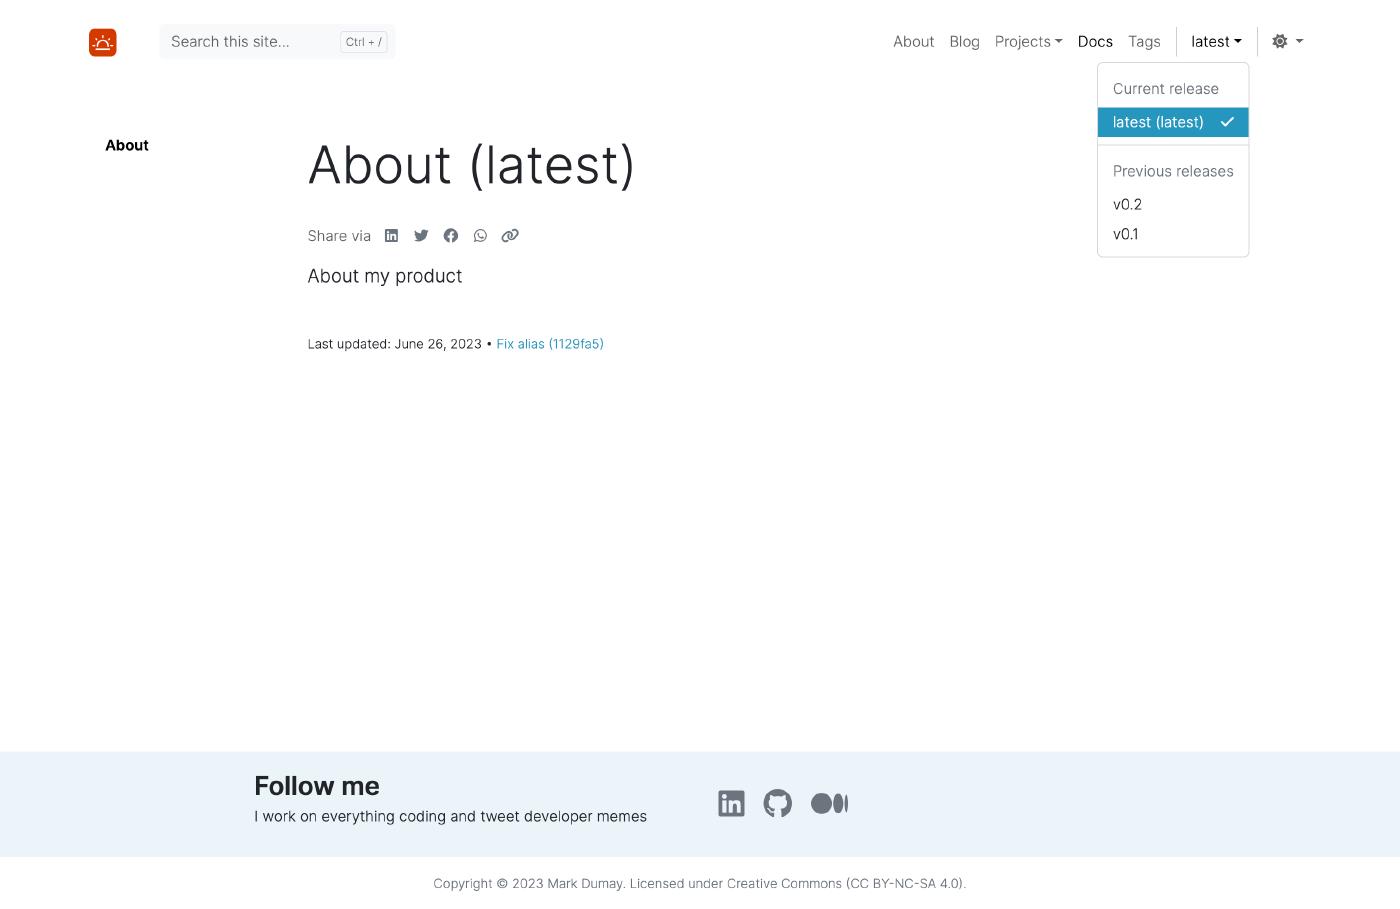
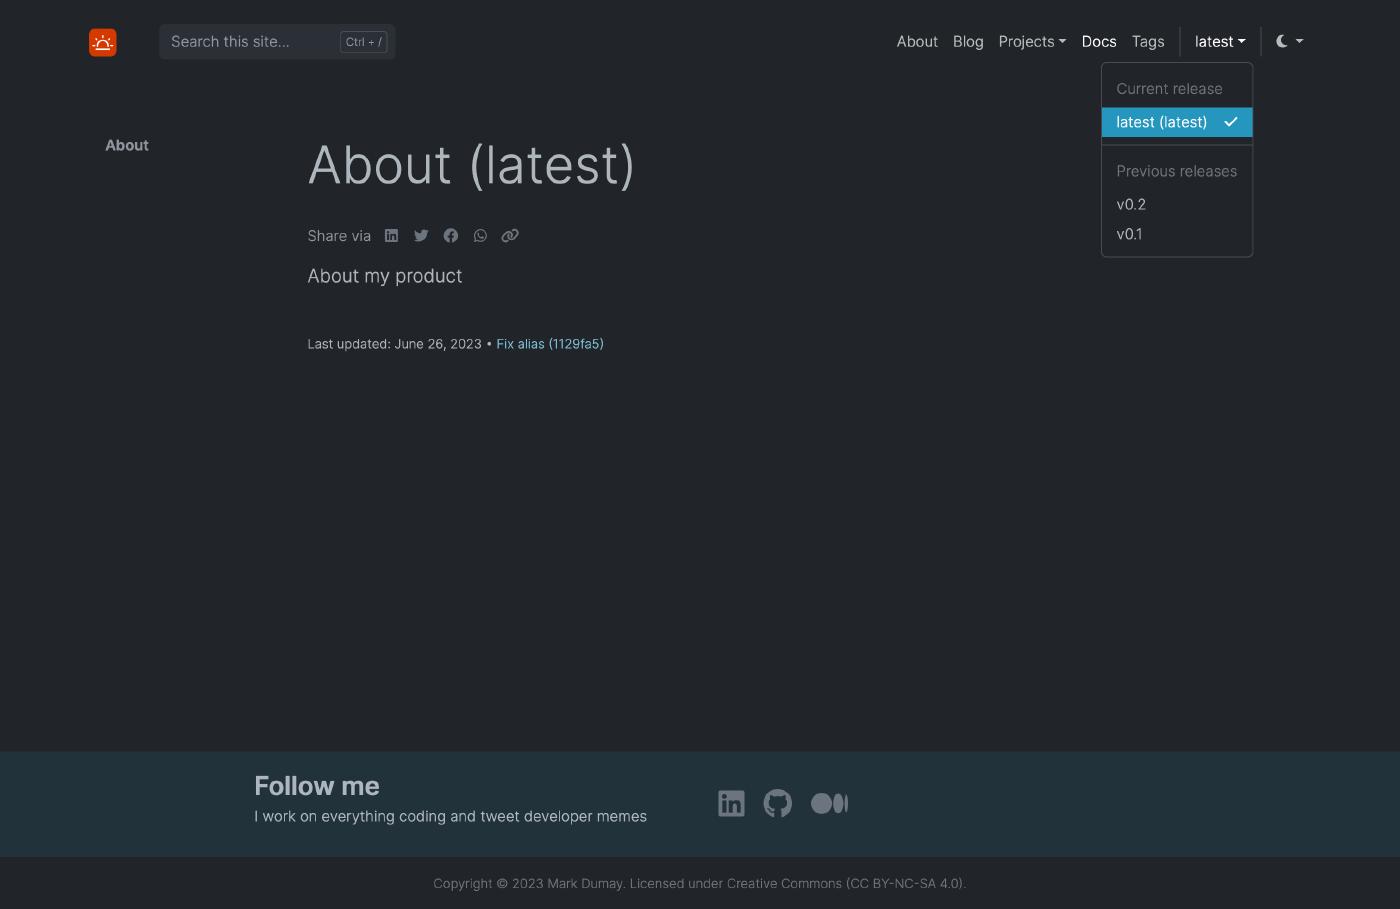
We will now configure a drop-down menu in the main navigation to enable switching of the active version. We will add an entry for each release, identified by the labels v0.1, v0.2, and latest. The argument url matches the release with the correct content folder.
To improve the layout of the menu, we can tag a specific release as latest. We can also group releases by adding a label without an url. The menu is rendered in the order as configured. Add the following content to config/_default/params.toml:
[[docs.releases]]
  label = "Current release"

[[docs.releases]]
  label = "latest"
  url = "/docs/latest/"
  latest = true

[[docs.releases]]
  label = "Previous releases"

[[docs.releases]]
  label = "v0.2"
  url = "/docs/0.2/"

[[docs.releases]]
  label = "v0.1"
  url = "/docs/0.1/"
Check if your site is working correctly. You may need to restart your local server for the aliases to work properly. Additionally, you might have to clear your browser cache too.
Deploying the current branch
We will now deploy and publish the main branch with Netlify. For the deployment to be successful, you will need to specify the baseURL in config/_default/hugo.toml. The Hinode template defines a default value that you will need to replace. You can use a domain that you own, or use a domain provided by Netlify (such as {sitename}.netlify.app/). If you do not know the sitename or domain name yet, you can go ahead with the deployment and come back to this step later - you will need to redeploy the site though.
baseURL = "https://template.gethinode.com/" # replace thisHead over to your repository on Github and submit a Pull Request (PR) to update your main branch. When successful, login to your Netlify account and create a new site. You can follow the Netlify deployment guidelines for a more detailed explanation. Once done, validate that you have a working site in production.
Step 3 - Using multi-branch deployments
The approach with various version folders in the same repository might be adequate for smaller documentation sites. However, complex documentation sites might have thousands of pages. Ideally, we would use Git to track all of the versioned changes. We can use multi-branch deployments to achieve this goal. The support and configuration of multi-branch deployments varies across hosting providers. The remainder of this guide uses Netlify as provider.
Creating a new branch
Create a new branch called v0.9 that is derived from your current branch (be sure to commit the current branch first). For demonstration purposes, we will expose the latest folder as the specific version 0.9. Ofcourse, we could simply rename the physical folder and be done with it. However, we would loose the ability to easily track changes to our documentation in the Git repository. Renaming a folder implies that the old folder and content are removed, and a new folder is created. Instead, we will use Hugo’s mounting feature to rename and expose the folder on the fly1.
defaultContentLanguage to en and defaultContentLanguageInSubdir to false. We will need to manually refine our mounts to achieve the same behavior.Add the following mount to config/_default/hugo.toml to map the latest folder to 0.9. We will keep the remaining content within the docs folder as is.
  [[module.mounts]]
    source = "content/en/docs/latest"
    target = "content/docs/0.9"
    lang = 'en'
  [[module.mounts]]
    source = "content/en"
    target = "content"
    lang = 'en'
    excludeFiles = 'docs/latest/*'
Next we will update the title and alias in the frontmatter of content/en/docs/latest/about.md:
title: About (0.9)
aliases:
  - "/docs/0.9/"
  - "/docs/"
And finally, we will replace the label and url for the latest release in config/_default/params.toml:
[[docs.releases]]
  # label = "latest"      # old value
  label = "0.9"           # new value
  # url = "/docs/latest/" # old value
  url = "/docs/0.9/"      # new value
  latest = true
Configure the multi-branch deployment
We will deploy the v0.9 branch on a separate subdomain with a so-called multi-branch deployment. By default, Netlify publishes the main branch only, along with any previews. We can instruct Netlify to deploy an additional branch, such as v0.9. Netlify uses the branch name followed by two hyphens and your internal Netlify subdomain. We will use this pattern as our baseURL in config/_default/hugo.toml.
Update the baseURL of hugo.toml in your v0.9 branch, replacing {branch} and {sitename} with the correct values. Commit the changes to your branch when done.
baseURL = "https://{branch}--{sitename}.netlify.app/"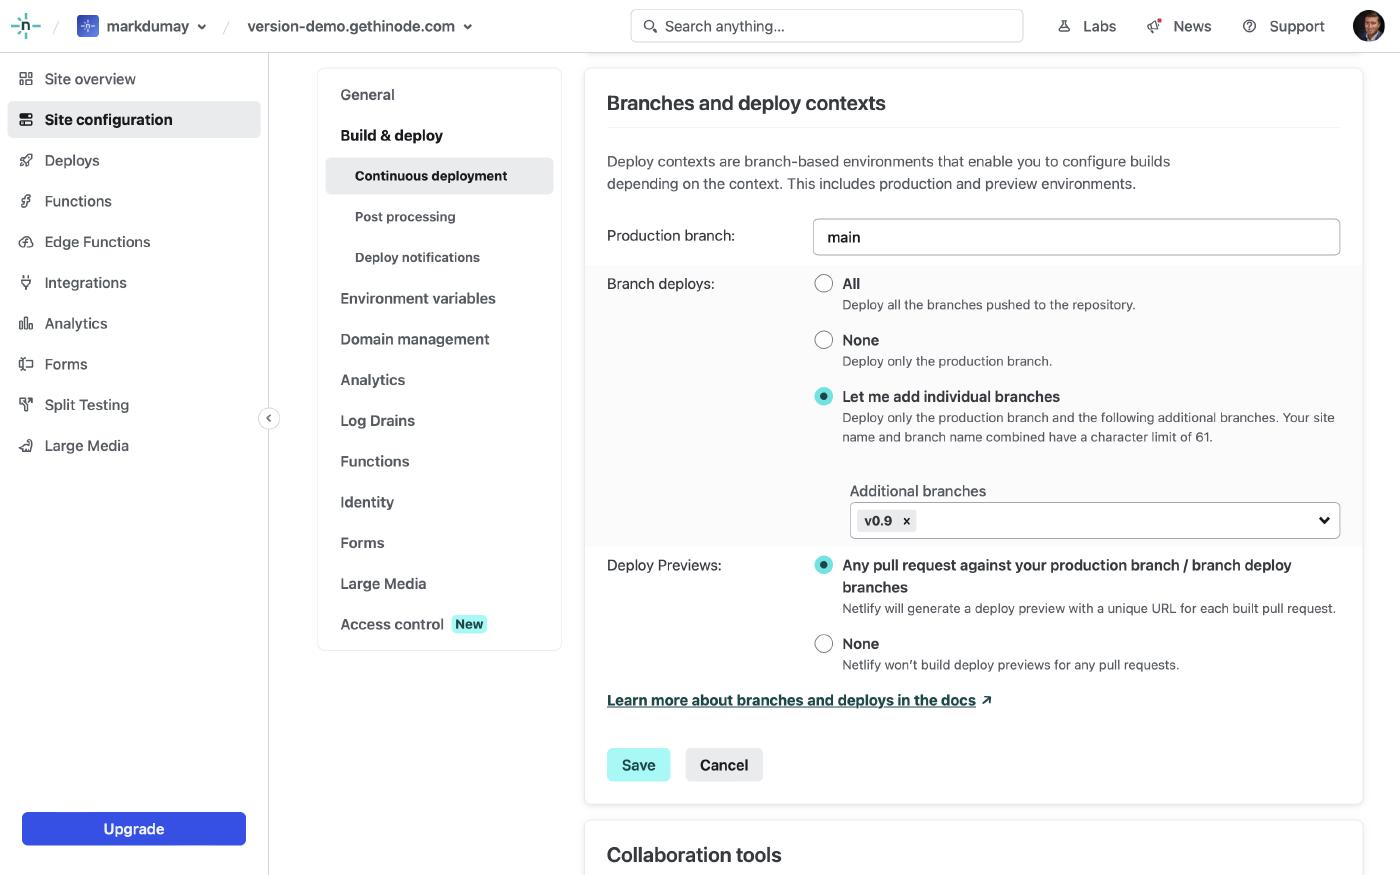
Head over to your Netlify configuration and navigate to the section Site configuration / Build & deploy / Continuous deployment. Next, scroll to the section Branches and deploy contexts and click the button Configure. Select the option Let me add individual branches for Branch deploys. In the text field, enter v0.9 as branch name. When done, click Save.
v0.9 branch are processed and released to production immediately. Set up branch protection rules and automated testing (similar to the main branch) as needed.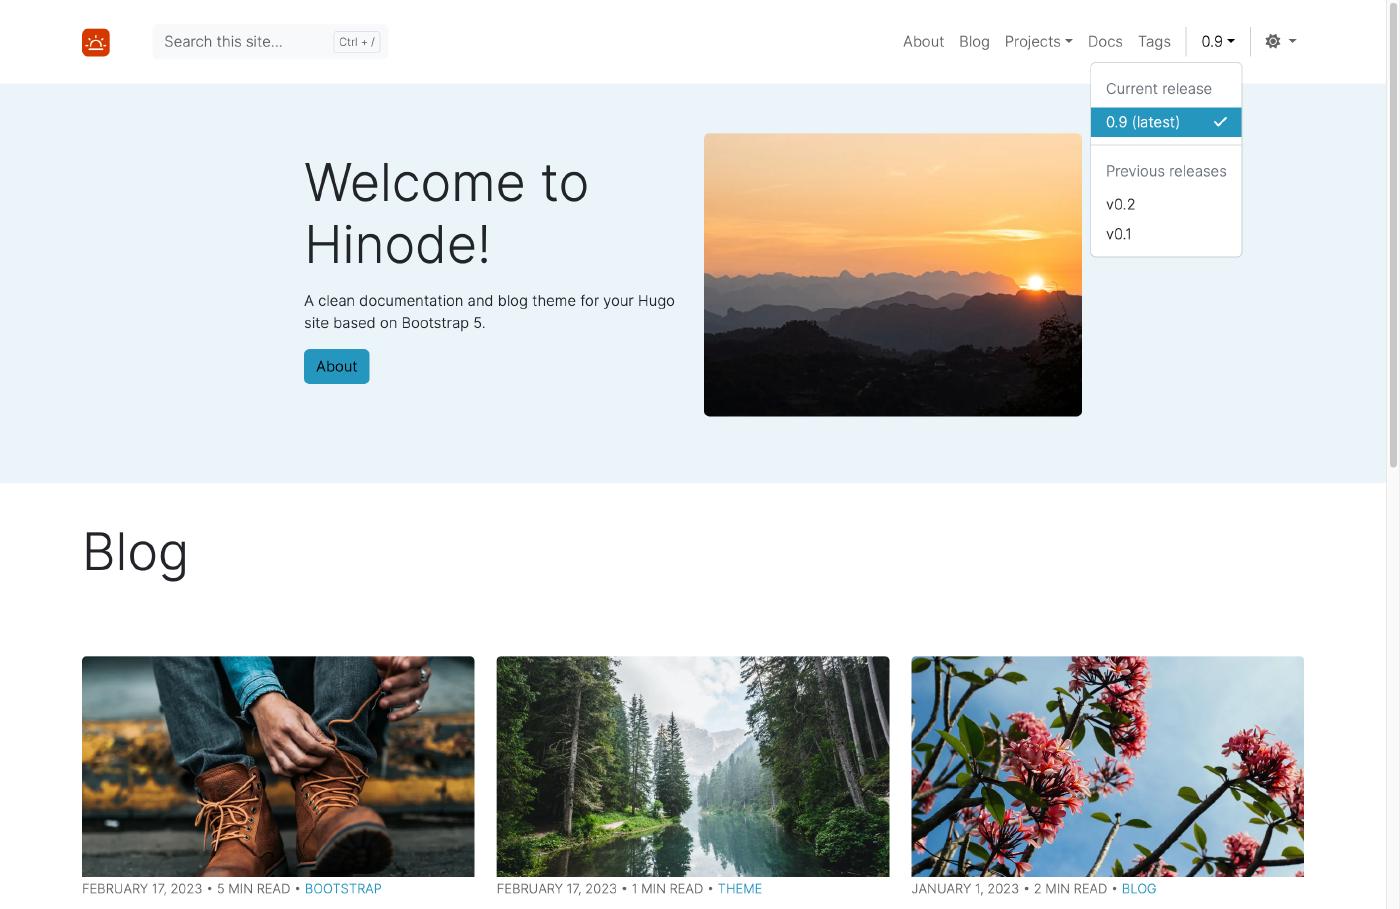
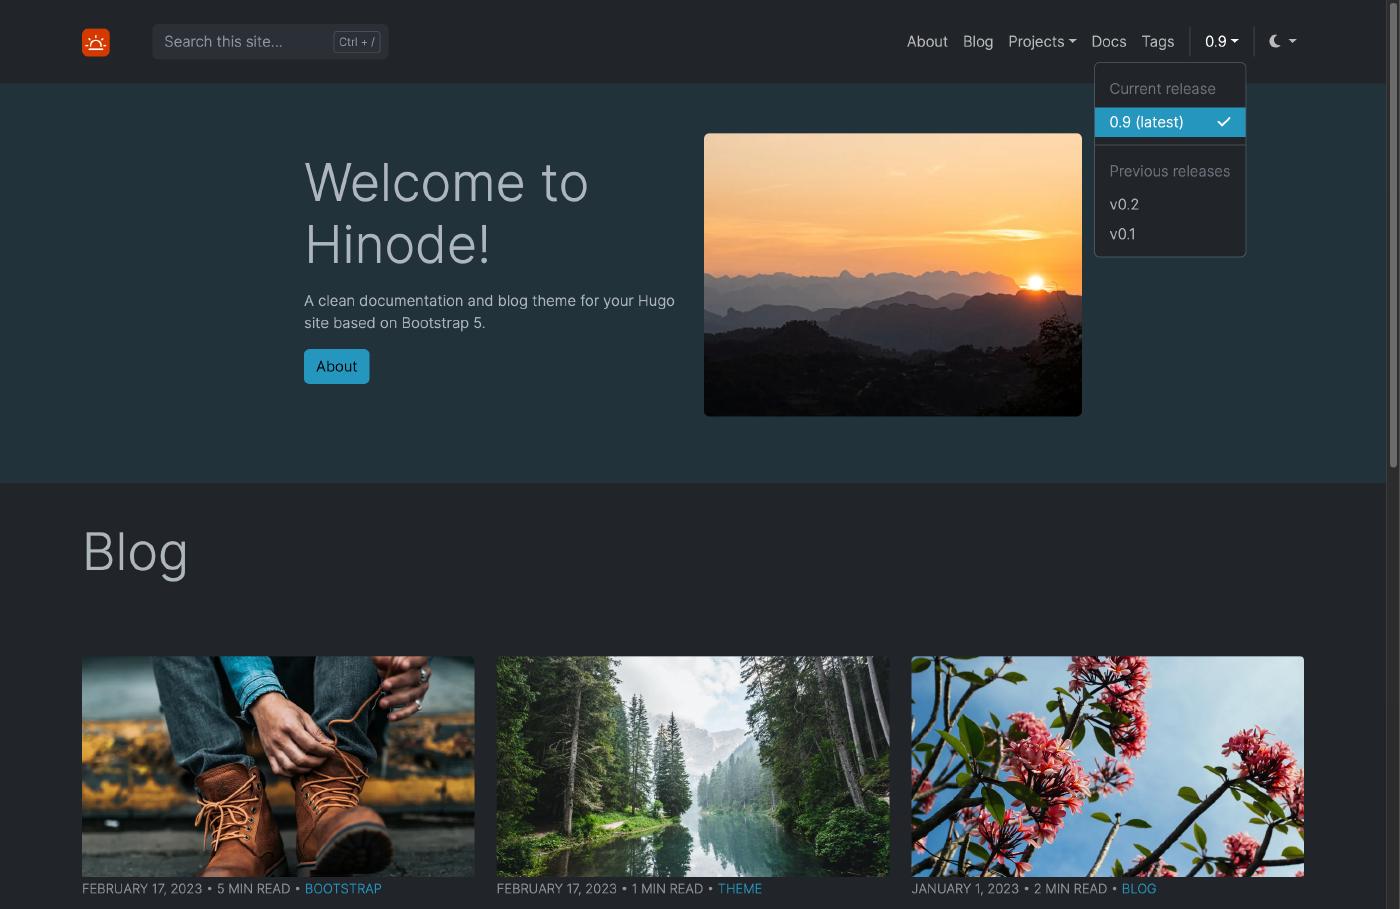
Test if the branch is deployed sucessfully by navigating to https://{branch}--{sitename}.netlify.app/. The default netlify.toml file in the repository root has enabled netlify.app in the Content Security Policy by default. Review and adjust the server headers as needed.
Step 4 - Updating the main site
Now that we have configured a branch-specific site for v0.9 of our documentation, it is time to go back to our main documentation site. In the final step of this guide we will set up server-side redirection to link to the newly deployed site. We will finish our configuration by adding a version overview and by configuring a version check.
Using server-side redirection
Hugo supports client-side redirection using aliases. We have defined these aliases in our about pages. In this approach, the browser receives an instruction to redirect to a new URL when visiting the initial page. We can instruct the server to redirect the URL instead, thus safing an additional roundtrip.
Hinode has defined a template in layouts/index.redir to automatically generate server-side redirection rules for Netlify. When you add the status code 200 to such a rule, the redirection becomes a rewrite. In a rewrite, the URL in the visitor’s address bar remains the same, while the content is fetched from a different location behind the scenes. We will use this mechanism to fetch the content from the branch site.
Go back to your develop branch and add the below code to your production configuration in config/production/hugo.toml. The setting disableAliases disables all client-side redirection rules. Instead, the REDIR output generates all redirection rules for the server, including rewrites.
disableAliases = true

[outputFormats.REDIR]
mediaType = "text/netlify"
baseName = "_redirects"
isPlainText = true
notAlternative = true

[mediaTypes."text/netlify"]
delimiter = ""

[outputs]
home = ["HTML", "RSS", "REDIR"]
Redirecting the versioned docs
Still within the develop branch, add the below release configuration to config/_default/params.toml, replacing {sitename} with the correct value:
[[docs.releases]]
  label = "v0.9"
  url = "/docs/0.9/"
redirect = "https://v0-9--{sitename}.netlify.app/docs/0.9/"The redirect value maps the release 0.9 to our branch deployment in production. The url points to the mount that we have defined previously.
You can test the redirection rules by building the site locally:
npm run buildOpen the file public/_redirects to review the rules. The first rule uses the code 200 to instruct Netlify to set up a rewrite. The other rules are common redirects as defined by the various aliases.
/docs/0.9/* https://v0-9--{sitename}.netlify.app/docs/0.9/docs/0.9/:splat 200
/docs/1.0/ /docs/1.0/about/
/docs/ /docs/1.0/about/
/docs/0.1/ /docs/0.1/about/
/docs/0.2/ /docs/0.2/about/
Adding a version overview
You can add a link to a custom overview page. An example of such a version overview page is available in the demo repository. Add the link to the page in the overview setting within the docs section of the config/_default/params.toml. Do not forget to add the configuration to the v0.9 branch too, if desired.
[docs]
  overview = "/docs/versions/"
Defining a version check
You can add an alert to inform your users that they are not looking at the latest version of the available documentation. Specify the latest available version in latest. When you set checkVersion to true, Hinode checks if the current version is equal or newer than the latest version. Hinode shows an alert at the top of the page when the current version is behind. The alert links to the latestURL. Do not forget to add the configuration to the v0.9 branch too, if desired.
[docs]
  latest = "1.0"
  checkVersion = true
  latestURL = "https://version-demo.gethinode.com/docs/"
Exposing the latest release as 1.0
Similar to the v0.9 release, you can can expose the latest release as a specific version too. In the develop branch, add the following mounts to config/_default/hugo.toml:
  [[module.mounts]]
    source = "content/en/docs/latest"
    target = "content/docs/1.0"
    lang = 'en'
  [[module.mounts]]
    source = "content/en"
    target = "content"
    lang = 'en'
    excludeFiles = 'docs/latest/*'
Next, update the Title and aliases in the frontmatter of content/en/docs/latest/about.md:
title: About (1.0)
aliases:
  - "/docs/1.0/"
  - "/docs/"
And finally, we will replace the label and url for the latest release in config/_default/params.toml:
[[docs.releases]]
  # label = "latest"      # old value
  label = "1.0"           # new value
  # url = "/docs/latest/" # old value
  url = "/docs/1.0/"      # new value
  latest = true
Conclusion
In this guide we have configured a version-aware documentation site using two different strategies. The approach using different folders is the most straightforward and might be sufficient for smaller sites. You could consider a multibranch approach when maintaining a complex documentation site. The configuration and deployment of such a site is provider-specific though. In this guide we have used Netlify as an example, which you could adapt to your own needs.
We could skip the mounting entirely and use a server-side rewrite instead. However, we would lose the ability to test the site locally. ↩︎